이전까지는 하나의 씬에서 게임을 진행하는데 필요한 요소들을 만들었습니다.
하지만 타워 디펜스 게임을 해보면
타이틀, 난이도 선택 등 다른 화면이 있습니다.
이를 만들어 보겠습니다.
11. 타이틀 씬
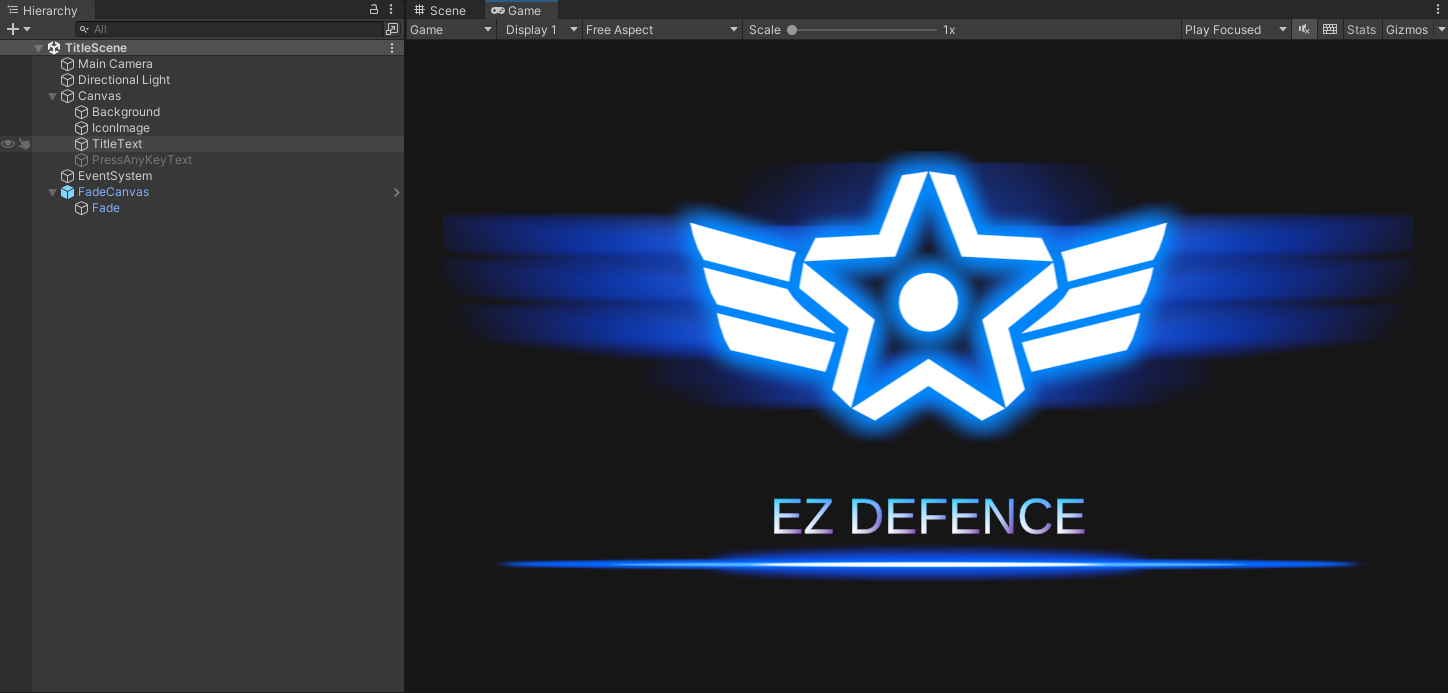
게임 이름, 타이틀 이미지를 표시합니다.
using UnityEngine;
using System.Collections;
using UnityEngine.SceneManagement;

public class TitleManager : MonoBehaviour
{
    const float whenTextAppears = 3f;
    const float whenGoToMenu = 10f;
    bool isInputPermitted;
    Transform PressAnyKeyText;
    FadeManager fm;

    // Start is called before the first frame update
    void Start()
    {
        isInputPermitted = false;
        PressAnyKeyText = transform.Find("PressAnyKeyText");
        fm = GameObject.Find("FadeCanvas").GetComponent<FadeManager>();
        // 타이틀 화면 구동
        StartCoroutine(TitleRoutine());
    }

    // Update is called once per frame
    void Update()
    {
        // 입력이 허가되고 아무 키 입력이 있을 경우
        if (Input.anyKeyDown && isInputPermitted)
        {
            // 타이틀 화면 코루틴을 멈추고
            StopCoroutine(TitleRoutine());

            // 페이드 아웃 효과
            StartCoroutine(LoadMenu());
            // 페이드 아웃 효과 후 메인 메뉴 씬으로 이동
        }
    }

    // 타이틀 화면에서 다음 화면으로 이동까지 구동 내용
    IEnumerator TitleRoutine()
    {
        // 3초 지연
        yield return new WaitForSeconds(whenTextAppears);
        // Press Any Key 텍스트가 출현하고, 키 입력 활성화
        if (!PressAnyKeyText.gameObject.activeSelf)
        {
            PressAnyKeyText.gameObject.SetActive(true);
            isInputPermitted = true;
        }
        // 그 후 10초 지연
        yield return new WaitForSeconds(whenGoToMenu);
        // 화면 페이드 아웃 효과 후 메뉴로
        StartCoroutine(LoadMenu());
    }

    IEnumerator LoadMenu()
    {
        // 화면 전환 중 추가 입력 방지
        isInputPermitted = false;

        // 페이드 아웃 효과
        StartCoroutine(fm.FadeInOut());

        // 페이드 아웃 효과를 보여주기 위해 다음 씬 로드 전에 딜레이를 줌
        float delayForSceneChange = 2f;
        yield return new WaitForSeconds(delayForSceneChange);

        // 메인 메뉴 화면으로
        string MainMenuSceneName = "MainMenuScene";
        SceneManager.LoadScene(MainMenuSceneName);
    }
}
타이틀 화면 연출, 씬 전환 관련이 들어갑니다.
메인 메뉴 씬은 배울 때 수업 내용 그대로 넣긴 했으나
지금 혼자 다시 만든다면 뺄 요소인 듯합니다.
따로 다룰 만한 내용은 없으며 바로 레벨 선택 씬으로 넘어갑니다.
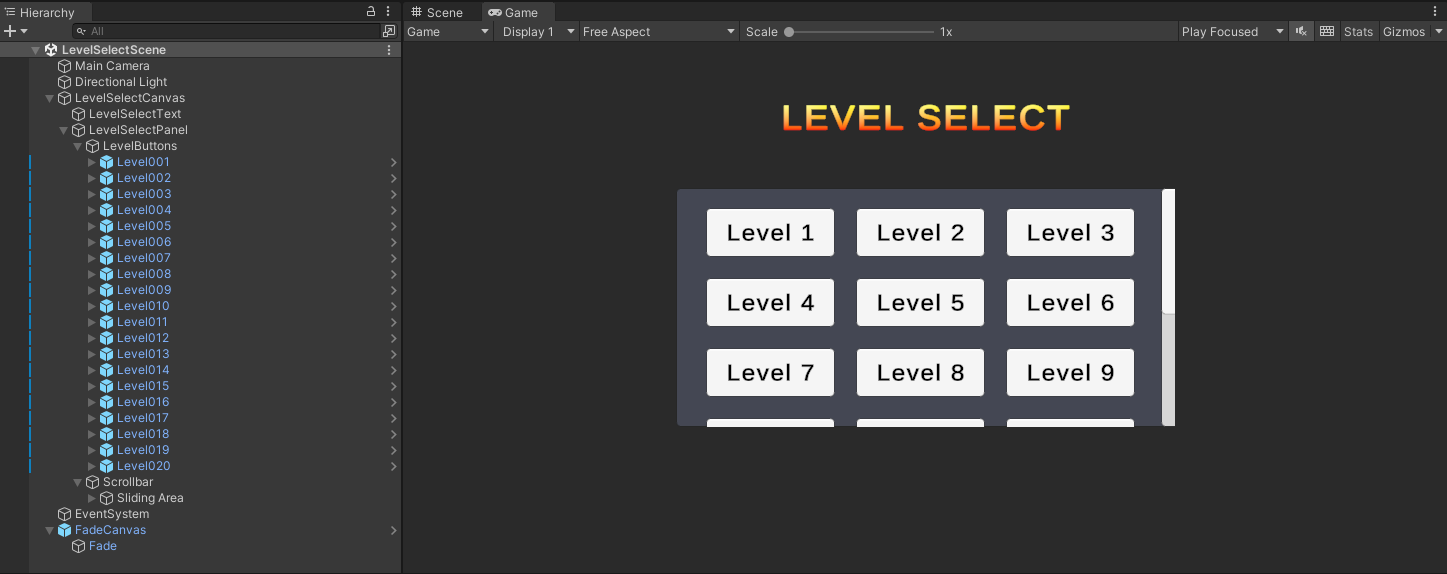
12. 레벨 선택 씬
using UnityEngine;
using UnityEngine.SceneManagement;
using System.Collections;
using UnityEngine.EventSystems;
using UnityEngine.UI;
using TMPro;

public class LevelSelectManager : MonoBehaviour
{
    FadeManager fm;
    // 레벨 버튼 클릭 여부
    bool isLevelSelected;
    string SceneName;

    bool isAutoScrolled;

    int clearedStageMax;

    // UI의 한 줄에 들어가는 버튼 수
    const int numButtonsInOneLine = 3;

    private void Start()
    {
        fm = GameObject.Find("FadeCanvas").GetComponent<FadeManager>();
        isLevelSelected = false;
        SceneName = null;

        // 이전에 플레이 한 기록이 없다면 클리어한 최고 레벨의 스테이지를 0으로 초기화해준다
        if (!PlayerPrefs.HasKey("maxClearedStage"))
            PlayerPrefs.SetInt("maxClearedStage",0);
        // 플레이어가 이전에 클리어한 최고 레벨의 스테이지를 클라이언트에서 받아온다
        clearedStageMax = PlayerPrefs.GetInt("maxClearedStage");

        // 태그로 받아올 때 하이어라키 창 순서대로 가져오진 않는다
        //GameObject[] LevelButtons = GameObject.FindGameObjectsWithTag("LevelButton");
        // 레벨 선택 버튼 게임 오브젝트들을 받아옴
        Button[] LevelButtons = GameObject.Find("LevelButtons").GetComponentsInChildren<Button>();
        // 기본적으로 Level 선택 버튼은 모두 상호작용 불가능
        // 레벨 선택 씬 시작에 클리어한 최고 레벨의 버튼까지 상호작용 가능하게
        for (int i = 0; i < LevelButtons.Length; i++)
        {
            if(i <= clearedStageMax)
                LevelButtons[i].interactable = true;
            else
                LevelButtons[i].interactable = false;
        }
        isAutoScrolled = false;
    }
    private void Update()
    {
        // 씬 로드 시 최종 클리어한 레벨의 다음 레벨이 제일 윗줄에 보이도록 자동 스크롤
        // LevelButtons의 Height가 처음엔 0이다가 실행 후 잠시 뒤 Constant Size Filter에 의해 버튼 수에 따라 커진다
        // 따라서 스크롤 조정은 LevelButtons의 Height 값이 제대로 들어온다면 업데이트에서 1번만
        if (!isAutoScrolled)
        {
            // LevelButtons의 Height - LevelSelectPanel의 Height = 스크롤 가능한 y 포지션 최대값
            // 따라서 LevelButtons의 y 포지션을 바꾸면 스크롤 위치 변경 가능
            RectTransform LevelButtons_RectTransform = GameObject.Find("LevelButtons").GetComponent<RectTransform>();
            // LevelButtons의 Height가 정해진 후
            if (LevelButtons_RectTransform.sizeDelta.y > 0)
            {
                float LevelSelectPanel_height = GameObject.Find("LevelSelectPanel").GetComponent<RectTransform>().sizeDelta.y;
                // 스크롤 가능한 LevelButtons의 최대 Pos Y
                float scrollablePosMax = LevelButtons_RectTransform.sizeDelta.y - LevelSelectPanel_height;
                // 높이 차이가 0 이하이면 스크롤 영역이 없으므로 스크롤할 필요도 없다
                if (scrollablePosMax <= 0)
                {
                    isAutoScrolled = true;
                    return;
                }
                // 처음 스크롤 위치 0, 버튼 높이 50, 버튼 간 간격 20 따라서 줄을 바꾸려면 scrollablePosMax가 버튼 높이 + 버튼 간 간격인 70씩 증가
                // 그런데 버튼 높이, 간격을 바꾼다면? -> 값을 받아와서 줄 간격을 설정하자
                GridLayoutGroup LevelButtons_LayoutGroup = GameObject.Find("LevelButtons").GetComponent<GridLayoutGroup>();
                // 줄 간격 = 레벨 선택 버튼 높이 + 버튼 y 간격
                float lineSpacing = LevelButtons_LayoutGroup.cellSize.y + LevelButtons_LayoutGroup.spacing.y;
                // 몇번째 줄인가 = 최종 클리어한 레벨의 다음 레벨에 한 줄에 들어가는 버튼 수를 나눈 몫
                // 줄 간격 * 줄 수를 곱하면 스크롤 할 위치가 된다!
                float ScrollPos = clearedStageMax / numButtonsInOneLine * lineSpacing;
                // 스크롤 할 좌표가 최대 스크롤 가능 위치보다 작다면, 스크롤 할 좌표만큼 내림
                // 크다면, 최대 스크롤 가능 좌표만큼 내림
                // RectTransform은 position, localPosition이 아니라 anchoredPosition으로 옮겨야한다
                if (ScrollPos < scrollablePosMax)
                    LevelButtons_RectTransform.anchoredPosition = new Vector3(0f, ScrollPos, 0f);
                else
                    LevelButtons_RectTransform.anchoredPosition = new Vector3(0f, scrollablePosMax, 0f);
                isAutoScrolled = true;
            }
        }

        // 레벨을 고른 후에는 해당하는 레벨 씬으로 이동하여 게임 시작
        if (isLevelSelected)
            StartCoroutine(LoadLevel());
    }
    // 버튼이 눌러졌을 때 bool 변수를 바꿔줘서 트리거로
    public void StageButtonPressed()
    {
        // 선택한 버튼의 게임 오브젝트 명칭을 해당 레벨의 씬의 이름과 같게 함
        // -> 그 명칭으로 불러오면 해당하는 레벨 씬 불러옴
        SceneName = EventSystem.current.currentSelectedGameObject.name;
        isLevelSelected = true;
    }
    IEnumerator LoadLevel()
    {
        isLevelSelected = false;
        // 페이드 아웃 효과
        StartCoroutine(fm.FadeInOut());

        // 페이드 아웃 효과를 보여주기 위해 다음 씬 로드 전에 딜레이를 줌
        const float delayForSceneChange = 2f;
        yield return new WaitForSeconds(delayForSceneChange);

        // 씬 이름(레벨 버튼 이름)은 Level001, Level002 ~ 이런 순으로 진행
        // 따라서 Level을 기점으로 문자열을 자르면 0번에는 null 문자열, 1번에는 001, 002 등의 스테이지 넘버가 들어간다
        PlayerStatus.curretStage = int.Parse(SceneName.Split("Level")[1]);

        // 선택한 레벨의 씬 불러오기
        SceneManager.LoadScene(SceneName);
    }
}
플레이 데이터를 불러와 클리어한 최고 난이도의 다음 난이도까지 활성화되게끔
씬으로 들어올 때 자동으로 최고 난이도를 제일 처음 보여주도록 스크롤
버튼 선택에 따른 씬 전환
1) 스크롤 가능한 패널
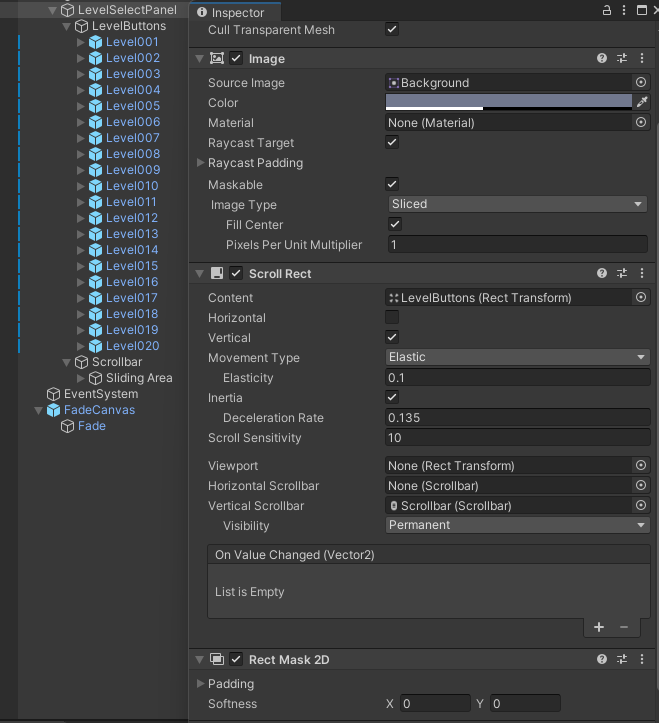
(1) Scroll Rect
스크롤 사각 영역 중 유일하게 스크롤 가능한 콘텐츠가 보이는 스크롤 뷰를 생성
스크롤바를 추가하여 수직, 수평으로 드래그 가능
일반적으로 마스크와 함께 사용
(2) Rect Mask 2D
자식 요소를 부모 요소의 사각형으로 제한하는 마스크
이를 벗어나는 부분의 자식 요소는 보이지 않음
2) 레벨 선택 패널
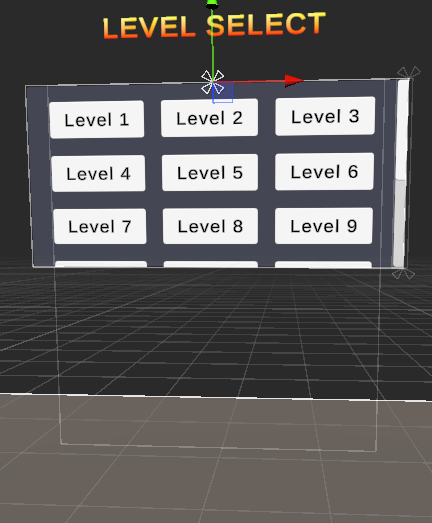
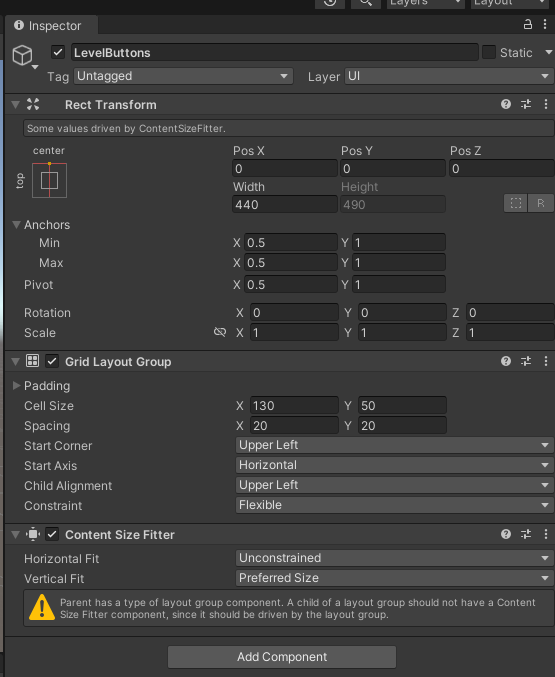
(1) Grid Layout Group
자식 오브젝트들(여기서는 스테이지 선택 버튼들) 을 동일한 사이즈, 간격으로 정렬
(2) Content Size Fitter
패널을 콘텐츠 크기에 맞게 조정
위의 스크린샷에서 볼 수 있듯이 스테이지 버튼이 많아짐에 따라 사이즈가 수직으로 늘어나게끔 설정
13. 레벨 별 플레이 씬
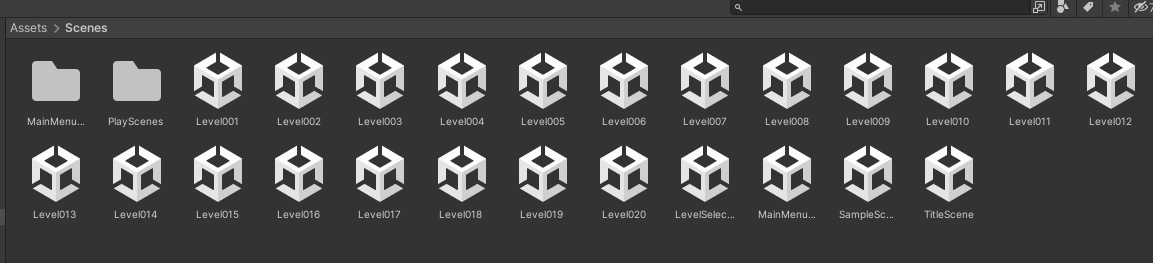
이전 포스팅까지 만들었던 플레이 씬인 Level01 을 복제하여 레벨 수만큼 만들어 줍니다.
1) 맵 변경 및 적이 지나가는 웨이포인트 변경
2) 적 스테이터스 조정
3) 사용 가능한 타워 추가
등 여러가지 요소를 통해 난이도를 만들어주면 됩니다.
'Unity 3D > 디펜스 게임' 카테고리의 다른 글
| 타워 디펜스 (6) - 빌드, 게임 플레이 (0) | 2025.03.29 |
|---|---|
| 타워 디펜스 게임 (4) - 이펙트 (0) | 2025.03.28 |
| 타워 디펜스 게임 (3) - UI, 타워 설치 (1) | 2025.03.27 |
| 타워 디펜스 게임 (2) - 플레이어(카메라 컨트롤, 코스트, 라이프, 치트), 타워 (0) | 2025.03.27 |
| 타워 디펜스 게임 (1) - 맵, 적, 이동 경로 (0) | 2025.03.25 |